
Why This Tuna Onigiri Recipe Will Become Your New Lunchbox Obsession
Let’s talk about the ultimate comfort food that fits perfectly in the palm of your hand.
If you are tired of the same old boring sandwiches for lunch, you are in the right place. I remember the exact moment I realized my midday meals needed a serious upgrade. I was staring sadly at a soggy turkey wrap. That was the day I decided to perfect this easy tuna onigiri recipe. It is incredibly satisfying, portable, and packs a massive punch of umami flavor.
You can make these delicious little rice triangles in just thirty minutes. They stay fresh all day. Plus, they bring a little bit of joy to an otherwise mundane workday.
What Exactly is Onigiri? Demystifying the Japanese Rice Ball
Onigiri is a staple Japanese comfort food made from white rice formed into triangular or cylindrical shapes and often wrapped in nori seaweed. Think of it as the original sandwich of Japan. People have been enjoying them for centuries as a quick snack or a full meal on the go.
It is brilliantly simple but wildly delicious.
Traditional fillings range from pickled plum to salted salmon. However, creamy tuna mayonnaise has easily become one of the most popular modern variations. The delicate balance of seasoned, sticky rice hugging a savory and rich filling is pure magic. When you bite into the crisp seaweed and hit that fluffy rice, you understand exactly why they are so universally loved.
The Secret to Recreating Authentic Konbini-Style Snacks at Home
Anyone who has visited Japan knows the undeniable allure of the konbini.
Japanese convenience stores are legendary for their high-quality fresh food. Their shelves are lined with perfectly wrapped rice balls that always taste incredibly fresh. Recreating that exact konbini experience in your own kitchen comes down to a few basic techniques. You need freshly cooked short-grain Japanese rice and wet hands to prevent sticking.
The real trick is not packing the rice too tightly. You want it firm enough to hold its shape but airy enough to melt in your mouth. Once you master this simple shaping method, you will be making this tuna onigiri recipe on a weekly basis.
What You’ll Need for the Ultimate Handheld Bite

Gathering the right components is the first step to perfecting this tuna onigiri recipe. You do not need a massive grocery haul to make these at home. In fact, you probably have half of these items in your pantry right now.
Let’s break down exactly what goes into these delicious little rice triangles.
The Non-Negotiable Foundation: Why Japanese Short-Grain Rice is a Must
Please do not try to use jasmine or basmati rice for this recipe. Long-grain varieties simply do not have the starch content required to stick together.
Japanese short-grain rice is plump, sticky, and holds its shape perfectly when molded. It is the absolute backbone of a good rice ball. You will also need a bit of salt for your hands to season the exterior of the rice as you shape it.
Crafting the Creamy, Zingy Spicy Tuna Center (And Kewpie Substitutions)
The filling is where the magic happens.
Japanese mayonnaise is the secret weapon here. It uses only egg yolks instead of whole eggs, giving it a much richer and creamier texture than American varieties. If you absolutely cannot find Kewpie mayo, just use regular mayonnaise whisked with a tiny pinch of sugar and a splash of rice vinegar.
Make sure you drain your canned tuna extremely well so your filling does not turn into a watery mess.
Elevating the Crunch: Nori Sheets, Furikake, and Sesame Seeds
Textures are incredibly important in Japanese cuisine.
A crisp piece of nori seaweed provides the perfect contrast to the soft, pillowy rice. Furikake is a savory Japanese rice seasoning usually made with dried fish, sesame seeds, and chopped seaweed. Tossing a little bit into the rice or dipping the edges of your finished onigiri adds a massive boost of umami.
Equipment
You truly do not need any fancy culinary gadgets to make this tuna onigiri recipe. Your own two hands are your best tools. However, having a few basics will certainly make your meal prep much smoother.
- Rice cooker or a medium saucepan with a tight-fitting lid
- Small mixing bowl
- Fork for flaking the tuna
- Measuring cups and spoons
- Cutting board and sharp knife
- Small bowl of water (for wetting your hands)
- Onigiri mold (completely optional, but helpful for beginners)
How to Make This Easy Tuna Onigiri Recipe
Now that we have our ingredients lined up, it is time to dive into the fun part. Shaping these rice balls is incredibly therapeutic.
Do not stress if your first few attempts look more like lumpy circles than perfect triangles. The taste will still be completely out of this world. Let us break down the process into four foolproof phases.
Phase 1: Cooking and Cooling the Perfect Batch of Sushi Rice
Everything starts with the rice. If you get this wrong, your rice balls will literally fall apart in your hands.
You must wash Japanese short-grain rice before cooking. This crucial step removes the excess surface starch that causes the grains to turn into a gummy, unappetizing paste. You want plump, glistening grains that stick together just enough to hold a shape. Once cooked, the rice needs to cool slightly. You are aiming for a temperature that is comfortably warm to the touch but still steaming.
- Place the uncooked rice in a large bowl and cover it with cold water.
- Swirl the grains vigorously with your fingers, then carefully drain the cloudy water. Repeat this process three to four times until the water runs mostly clear.
- Cook the rice according to your rice cooker instructions, or use a saucepan on the stovetop with a tight-fitting lid.
- Once fully cooked, let the rice sit covered for ten minutes to steam. Then, gently fluff it with a wet rice paddle.
- Transfer the fluffed rice to a wide baking dish or wooden bowl to cool down for about ten to fifteen minutes.
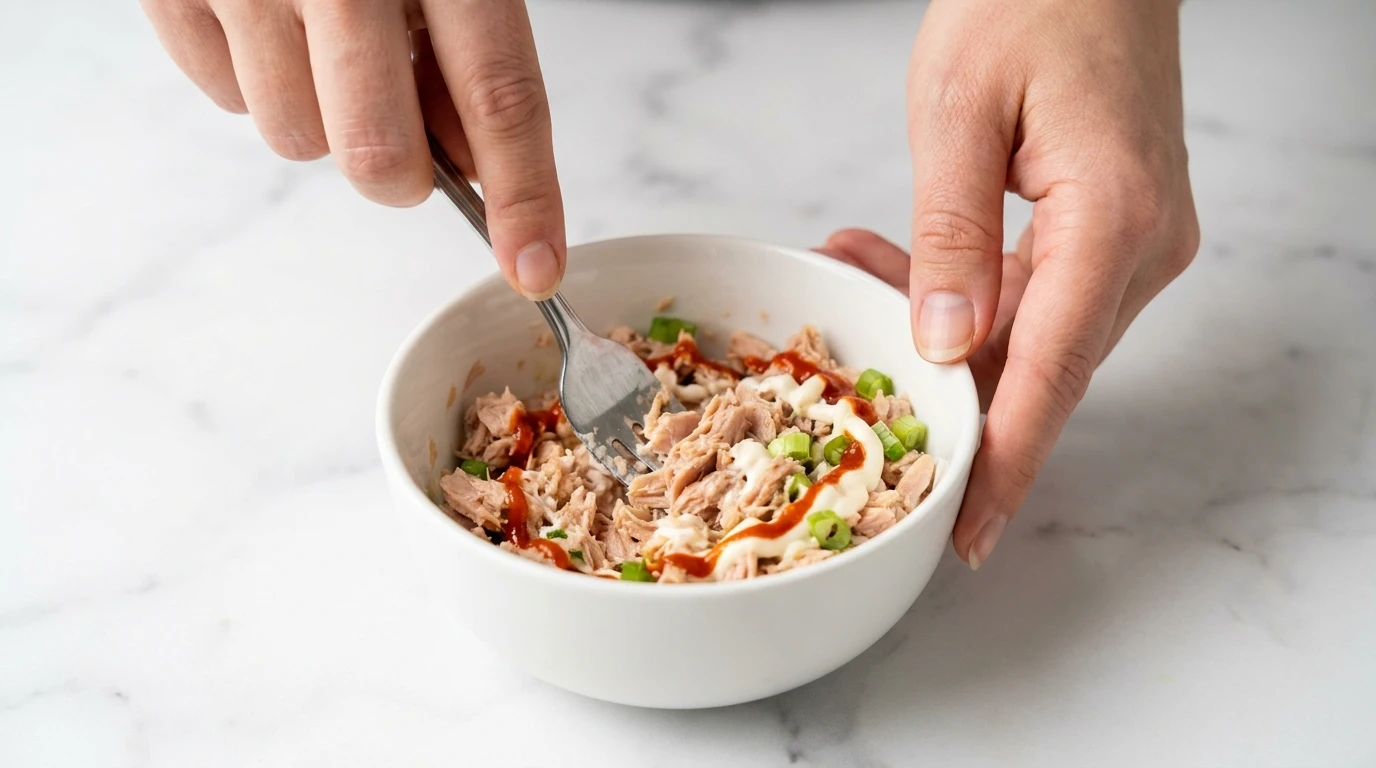
Phase 2: Whipping Up the Flavor-Packed Tuna Mixture
While your rice is cooling to that perfect warm temperature, let us build the savory center. You want a filling that is intensely flavorful but not heavily saturated with liquid.
Moisture is the absolute enemy of a structurally sound rice ball. If your filling is too wet, it will seep into the surrounding rice and cause the entire thing to collapse. Take an extra minute to squeeze every last drop of water out of your canned tuna.
- Open your can of tuna and press down firmly on the lid to drain out as much water as humanly possible.
- Transfer the dry, flaky tuna to a small mixing bowl.
- Add the Japanese mayonnaise, sriracha, soy sauce, and finely chopped green onion to the bowl.
- Use a fork to mash and fold everything together until it resembles a thick, creamy paste.
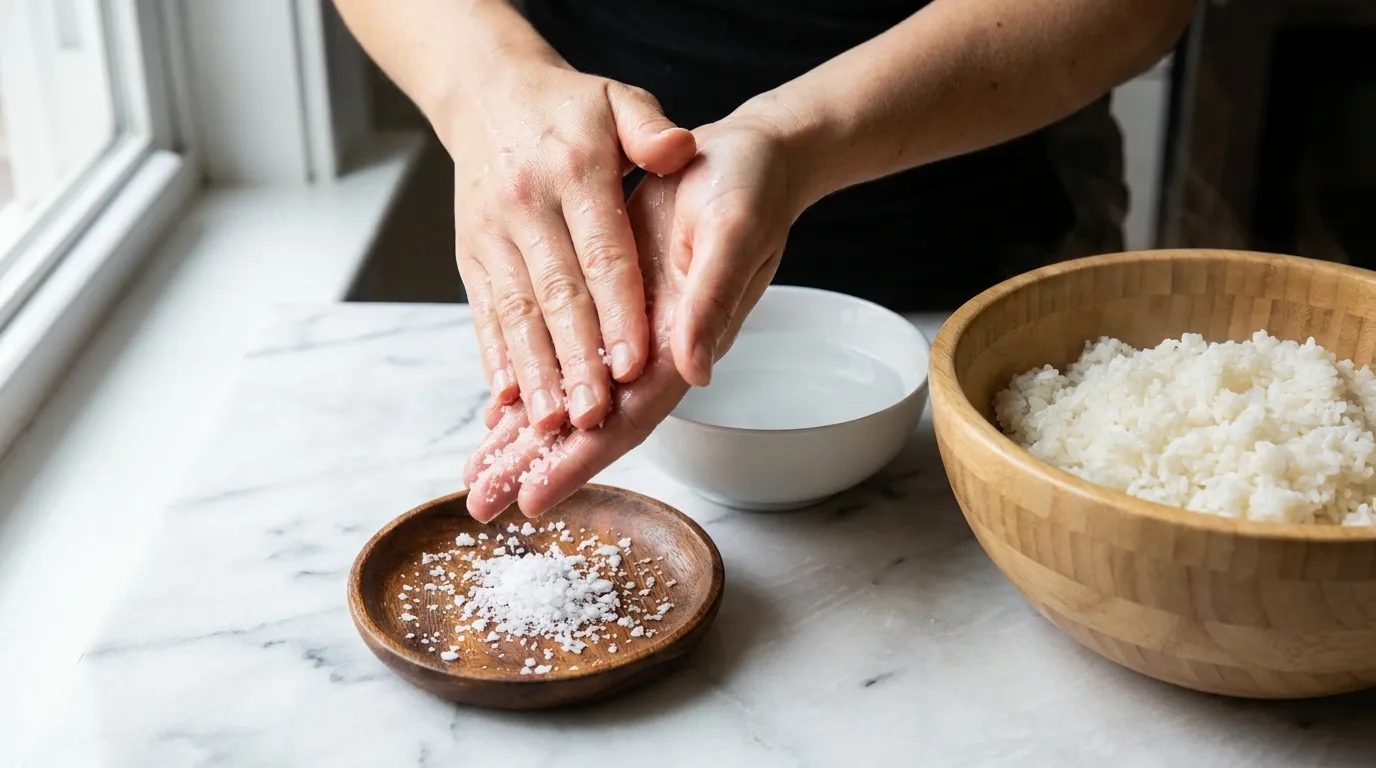
Phase 3: The Assembly Masterclass (Why Salt Water is Your Secret Weapon)
This is where the magic truly happens.
If you try to grab warm, starchy rice with dry hands, you will end up with a sticky disaster. The absolute secret to authentic shaping is keeping a bowl of water and a small dish of kosher salt right next to your workstation. The water prevents the rice from gluing itself to your skin. The salt seasons the outside of the rice ball, amplifying the flavors of the filling inside.
- Set up a shallow bowl of cold water and a small saucer of kosher salt on your prep counter.
- Dip both hands into the water to wet them thoroughly, then shake off the excess drops.
- Dip two fingers into the salt and rub it briskly across your wet palms.
- Scoop up a generous handful of warm rice (about half a cup) and gently flatten it into an oval in your non-dominant hand.
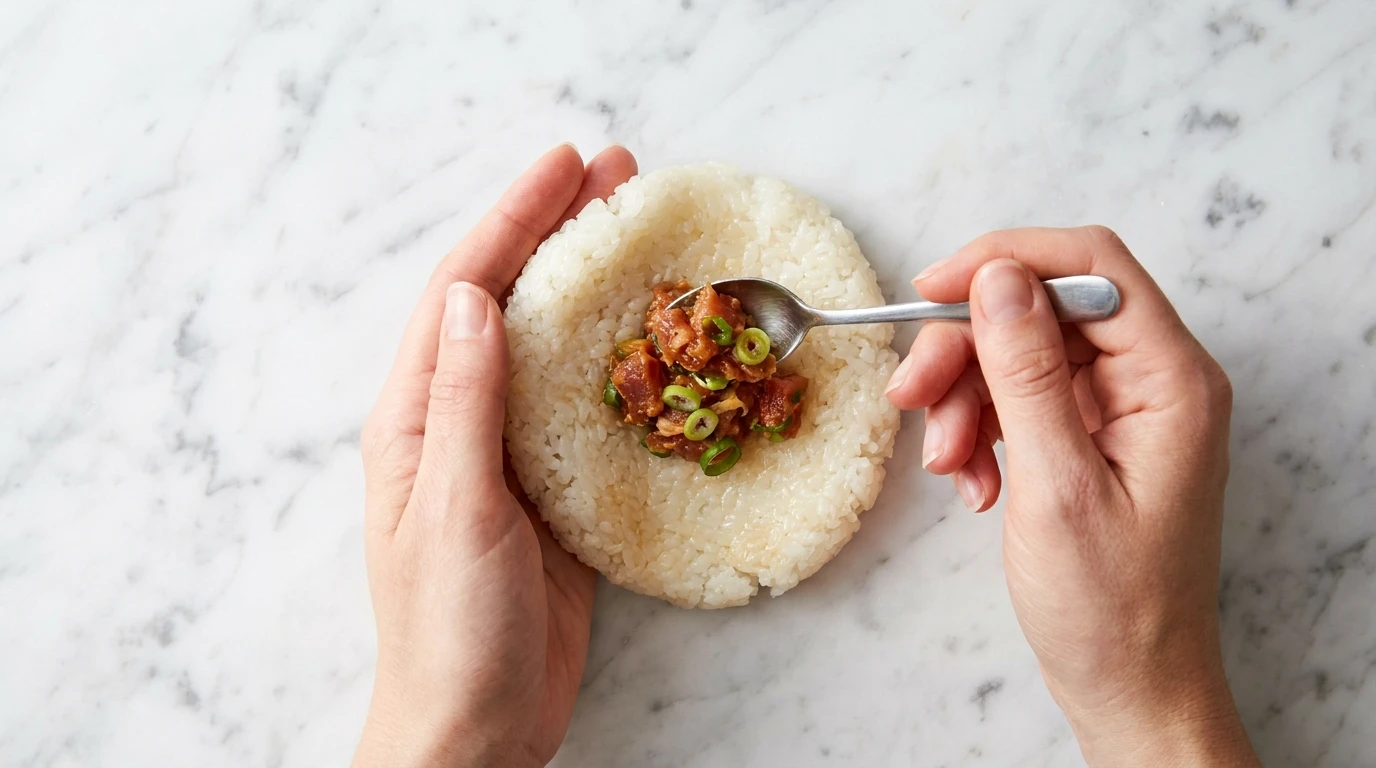
- Press a small indentation into the center of the rice oval.
- Drop exactly one tablespoon of your spicy tuna mixture directly into the well.
- Carefully fold the edges of the rice over the filling, adding a tiny pinch of extra rice on top if needed to seal the tuna completely.
The Shape Game: Using an Onigiri Mold vs. The Genius Plastic Wrap Hack
Traditionally, you would use your cupped hands to press the rice into a neat triangle. You do this by forming an “L” shape with your hands and gently rotating the ball, pressing the corners as you turn.
However, if you are struggling to get that iconic triangle shape, do not panic. You have two brilliant alternatives.
- The Mold Method: Purchase a cheap plastic onigiri mold online. Wet the inside of the mold, fill it halfway with rice, add the tuna, cover with more rice, and firmly press the lid down. Pop it out, and you have a flawless triangle every single time.
- The Plastic Wrap Hack: Lay a square piece of plastic wrap on your counter. Place your rice and filling in the center. Gather the four corners of the wrap and twist them together tightly to form a neat little bundle. Use your fingers to mold the plastic-wrapped ball into a triangle. This method keeps your hands completely clean!
Phase 4: The Final Fold: Wrapping the Nori for Maximum Crunch
We are finally at the finish line.
A crisp piece of seaweed provides the ultimate textural contrast to the soft, pillowy rice. The trick here is timing. If you wrap the rice ball too early, the steam from the rice will turn the seaweed soft and chewy. For the absolute best experience, wait to apply the nori until the exact moment you are ready to eat.
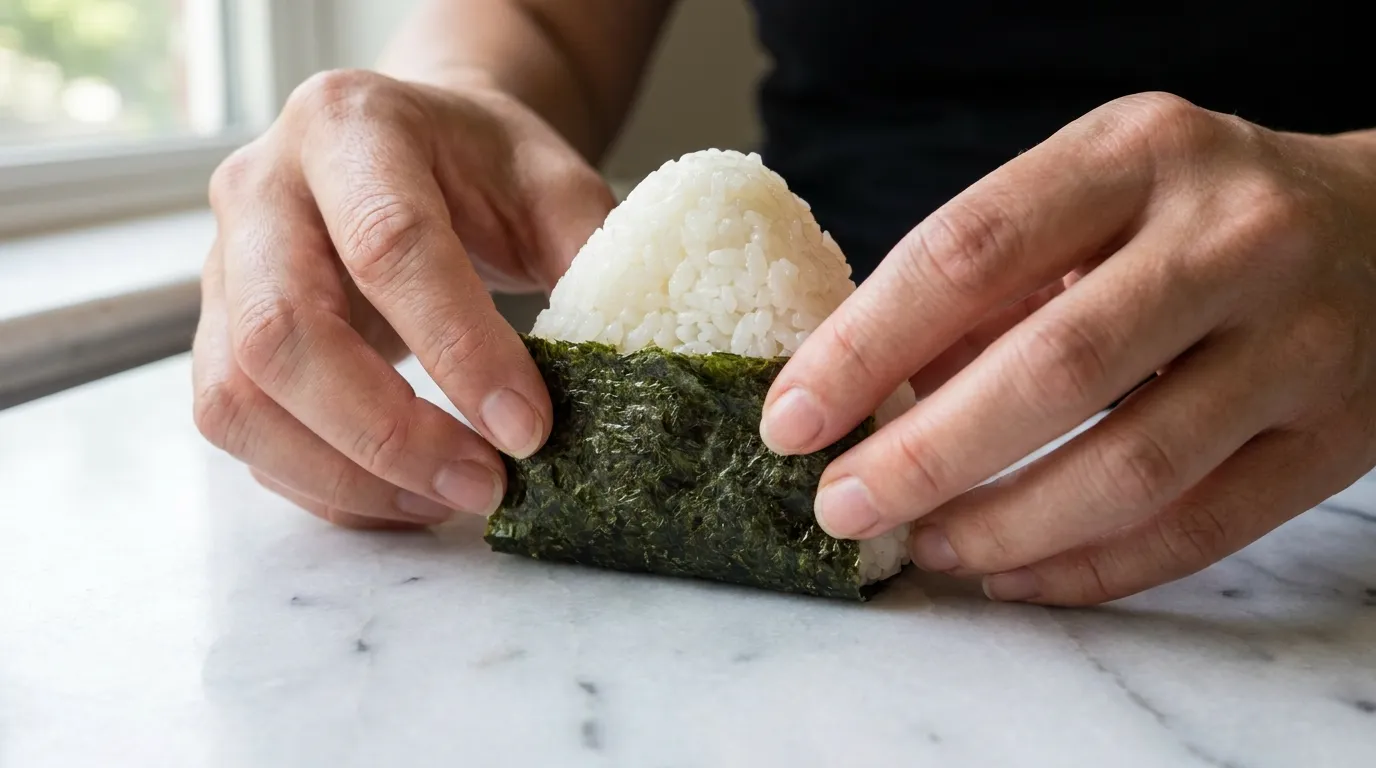
- Take a precut strip of roasted nori seaweed.
- Wrap it gently around the bottom base of the rice triangle. This gives you a convenient, non-sticky handle to hold while you eat.
- Dip the exposed, sticky edges of the rice into a shallow dish of furikake seasoning or toasted sesame seeds for an extra burst of crunch and umami.
Endless Filling Variations: From Canned Salmon to Butter-Sautéed Kimchi
Once you master this easy tuna onigiri recipe, a whole new world of lunch possibilities opens up. The rice acts as a brilliant blank canvas for almost any savory ingredient.
If you want to switch up your protein, swap the canned tuna for some flaked canned salmon mixed with a dollop of cream cheese and a dash of black pepper. It tastes exactly like a deconstructed bagel. For a punchy, vegetarian twist, finely chop some ripe kimchi and sauté it in a tiny bit of butter until the edges caramelize. The rich, spicy flavor is incredibly addictive when tucked inside a warm pocket of rice.
Craving a Crunch? How to Pan-Fry Your Rice Balls for Crispy Yaki Onigiri
Sometimes you need a little extra texture in your life.
Yaki onigiri is a popular variation where the shaped rice ball is grilled or pan-fried until a crust forms. To make it, skip the seaweed wrap completely. Heat a non-stick skillet over medium heat with a splash of sesame oil. Place your shaped tuna rice balls into the pan and let them sizzle for about three minutes per side.
Right before you pull them off the heat, brush the tops with a mixture of soy sauce and a little sugar. The soy sauce caramelizes instantly, creating a golden, crunchy exterior that smells absolutely heavenly.
Make-Ahead & Storage Secrets (How to Prevent Hard, Dry Rice in the Fridge!)
Rice has a terrible habit of drying out and turning hard when exposed to cold temperatures. If you just toss these on a plate in the fridge, you will be deeply disappointed the next day.
To keep them soft and fresh, wrap each individual rice ball tightly in a layer of plastic wrap immediately after shaping. Do not add the seaweed yet. Place the wrapped balls into an airtight container, and then wrap that entire container in a thick kitchen towel before putting it in the fridge. The towel acts as insulation, stopping the cold air from crystallizing the rice starches. When you are ready to eat, just let them sit at room temperature for thirty minutes, or microwave them for about fifteen seconds to revive that fluffy texture.
Common Shaping Mistakes (And How to Un-Stick Your Hands)
Let us troubleshoot a few common beginner hurdles.
The most frequent mistake is overstuffing. It is incredibly tempting to load up on that delicious spicy tuna, but too much filling will burst right through the walls of your rice ball. Stick to one modest tablespoon per serving. Another big issue is squeezing too hard. You are not packing a snowball for a fight. You want to apply just enough gentle pressure to hold the grains together so it remains light and airy inside.
Finally, if the rice is aggressively sticking to your fingers, your hands are too dry. Stop what you are doing, wash your hands completely, and re-wet them in your cold water bowl before trying again.
Nutrition Information (Per Onigiri)
210 kcal
8 g
36 g
3 g
*Nutritional values are estimates only. Actual macros may vary based on specific ingredient brands used.
Frequently Asked Questions
Can I use brown rice instead of white short-grain rice?
Standard long-grain brown rice will not work because it lacks the necessary stickiness. However, you can use short-grain brown rice. Just ensure you soak it well before cooking and understand that the texture will be slightly chewier and less cohesive than traditional white sushi rice.
Do I have to use Japanese mayonnaise?
While Kewpie Japanese mayo is highly recommended for its rich, umami-heavy flavor, you can easily substitute it. Mix regular American mayonnaise with a tiny splash of rice vinegar and a pinch of sugar to mimic that signature Japanese tang.
Can I freeze these for later?
Yes, you absolutely can! Wrap the shaped (but un-seaweeded) rice balls tightly in plastic wrap and store them in a freezer-safe bag for up to a month. To reheat, microwave the wrapped ball on high for about 1 to 2 minutes until fully warmed through, then wrap with fresh nori.
Why did my rice balls fall apart?
This usually happens for three reasons. The rice was rinsed too much, the rice was allowed to cool down too much before shaping, or the filling was too watery. Make sure to shape the rice while it is still quite warm and ensure your tuna is drained completely dry.
Easy Tuna Onigiri
AUTHOR: True Taste Buds
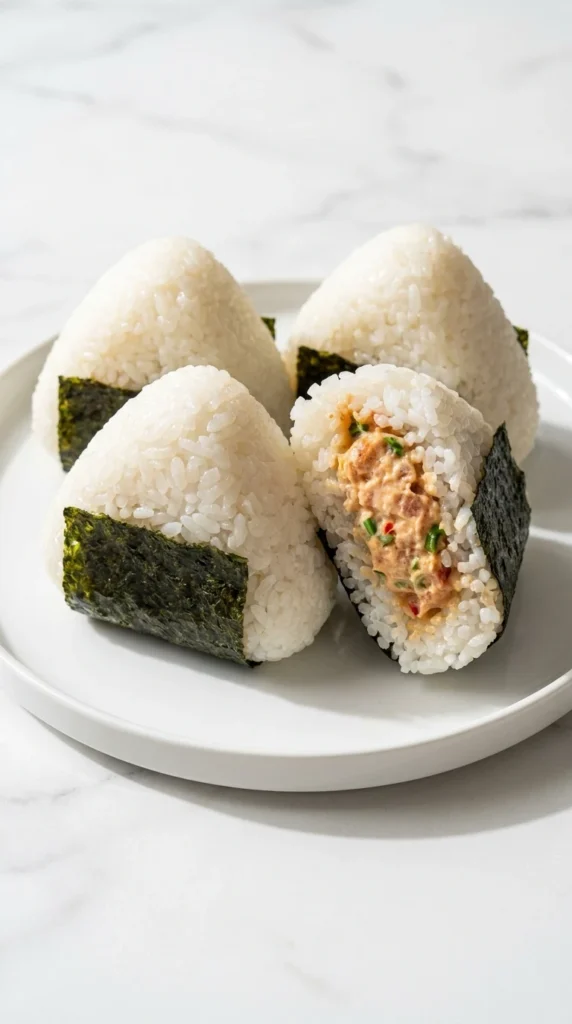
These perfectly portable, umami-packed Japanese rice balls feature fluffy short-grain rice filled with creamy, spicy tuna mayo and wrapped in a crisp sheet of nori seaweed.
15 MINS
15 MINS
30 MINS
8
Ingredients
- 2 cups uncooked Japanese short-grain rice
- 2 and 1/2 cups water
- 1 teaspoon kosher salt, divided
- 1 (5 ounce) can chunk light tuna in water, drained well
- 2 tablespoons Japanese mayonnaise
- 1 tablespoon sriracha sauce
- 1/2 teaspoon soy sauce
- 1 green onion, finely chopped
- 3 sheets roasted nori seaweed, cut into thirds
- 2 tablespoons furikake seasoning
- 1 tablespoon toasted white sesame seeds
Instructions
- Place the uncooked rice in a large bowl and cover it with cold water. Swirl the grains vigorously with your fingers, then carefully drain the cloudy water. Repeat this process three to four times until the water runs mostly clear.
- Cook the rice according to your rice cooker instructions, or use a saucepan on the stovetop with a tight-fitting lid.
- Once fully cooked, let the rice sit covered for ten minutes to steam. Then, gently fluff it with a wet rice paddle.
- Transfer the fluffed rice to a wide baking dish or wooden bowl to cool down for about ten to fifteen minutes.
- Open your can of tuna and press down firmly on the lid to drain out as much water as humanly possible. Transfer the dry, flaky tuna to a small mixing bowl.
- Add the Japanese mayonnaise, sriracha, soy sauce, and finely chopped green onion to the bowl. Use a fork to mash and fold everything together until it resembles a thick, creamy paste.
- Set up a shallow bowl of cold water and a small saucer of kosher salt on your prep counter. Dip both hands into the water to wet them thoroughly, then shake off the excess drops. Dip two fingers into the salt and rub it briskly across your wet palms.
- Scoop up a generous handful of warm rice (about half a cup) and gently flatten it into an oval in your non-dominant hand. Press a small indentation into the center of the rice oval.
- Drop exactly one tablespoon of your spicy tuna mixture directly into the well. Carefully fold the edges of the rice over the filling, adding a tiny pinch of extra rice on top if needed to seal the tuna completely. Shape into a triangle.
- Take a precut strip of roasted nori seaweed. Wrap it gently around the bottom base of the rice triangle. Dip the exposed, sticky edges of the rice into a shallow dish of furikake seasoning or toasted sesame seeds for an extra burst of crunch and umami.