
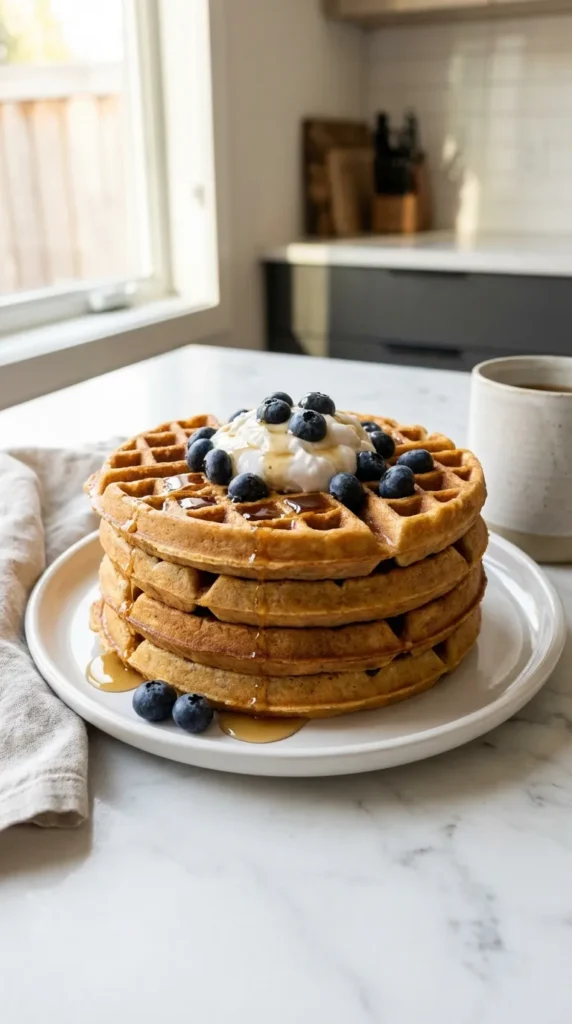
You really can make incredibly crispy, golden breakfast treats even if you run out of dairy. This waffle recipe without milk uses a simple pantry swap to keep the inside fluffy while achieving that perfect crunchy exterior. Let us get your waffle iron hot and ready for the best weekend breakfast ever.
How to Make Waffles Without Milk
Making breakfast should never involve a frantic morning trip to the grocery store.
I discovered this trick by pure accident when my family demanded a hot breakfast and the fridge was completely bare of milk. Water or a simple dairy-free alternative works absolute magic here. The secret to that iconic diner-style crunch actually lies in how the moisture evaporates in the iron. It leaves behind a beautifully browned crust.
You will be shocked at how rich they taste.
Many readers tell me they actually prefer this version over the classic dairy method because it yields a surprisingly lighter texture. Plus, it is incredibly forgiving. If you have basic baking staples, you are already halfway to a spectacular morning feast.
Ingredients

You probably already have most of these items sitting in your pantry right now. Making a waffle recipe without milk is all about utilizing your baking basics. The right ratio of standard staples guarantees a perfect texture every single time.
Dry Ingredients: The Foundation for Crispy Edges
Standard all-purpose flour gives these the exact structure they need to hold up in a hot iron. Baking powder provides the essential lift for a delightfully fluffy interior. We also use a touch of sugar to help the batter brown beautifully on the outside.
Wet Ingredients: The Secret Dairy-Free Binders
Here is where the real magic happens. We use plain water to hydrate the batter, which creates quick evaporation and yields an incredibly crispy exterior. Eggs bind the whole mix together. A neutral cooking oil adds essential richness since we are skipping the butter and milk.
Optional Flavor Boosters and Mix-Ins
Feel free to customize your morning feast to suit your cravings. A dash of cinnamon adds a cozy warmth to the basic batter. You can even toss in a handful of sweet morsels if you want something extra special for a weekend brunch.
Equipment
You do not need a fancy culinary setup to make this breakfast. A standard mixing bowl and your trusty heating element will do the trick perfectly.
- Waffle iron
- Large mixing bowl
- Medium mixing bowl
- Whisk
- Measuring cups
- Measuring spoons
Instructions
Step 1: Preheat and Lightly Grease Your Waffle Iron
- Turn on your waffle maker to medium-high heat and wait for the indicator light.
- Carefully brush the hot cooking plates with a very thin layer of vegetable oil to prevent sticking.

Step 2: Whisk the Dry Ingredients Thoroughly
- In a large mixing bowl, whisk together the flour, sugar, baking powder, and kosher salt.
- Mix them vigorously until the mixture looks uniform and aerated like soft sand.

Step 3: Combine the Wet Dairy-Free Ingredients
- Grab a medium bowl and briskly whisk the water, oil, beaten eggs, and vanilla extract.
- Beat them together until the mixture turns pale and completely smooth.

Step 4: Gently Fold the Batter (Do Not Overmix)
- Pour the wet liquids into the center of the dry flour mixture.
- Use a silicone spatula to gently fold everything together just until the dry pockets disappear.

Step 5: Pour the Batter and Cook Until Golden and Crisp
- Ladle the batter directly onto the center of your hot iron and close the lid tightly.
- Cook until the steam stops billowing out and the edges look deeply golden brown.

Step 6: Keep Waffles Warm and Prepare for Serving
- Carefully lift the crispy waffles out and place them directly on a wire rack inside a warm oven.
- This crucial step keeps them perfectly crunchy while you finish cooking the rest of the batch.

The Carbonated Water Trick for Extra Fluffy Waffles
You can effortlessly swap regular tap water for unflavored sparkling water. The little carbonation bubbles create tiny air pockets throughout the batter. This trick results in an unbelievably airy and light interior that tastes incredibly gourmet. It is absolutely my favorite weekend kitchen upgrade.
Water vs. Plant-Based Milks: Which Yields the Best Texture?
You might be tempted to reach for almond or oat milk to replace the dairy. I actually prefer plain water. Water evaporates rapidly in the hot iron to create an incredibly crispy outer shell. Plant-based milks add a bit more richness to the flavor profile but can make the exterior slightly softer. Both options work beautifully depending on your personal texture preference.
Freezing, Storing, and Reheating Secrets for Busy Mornings
Let any leftover waffles cool completely on a wire baking rack so they do not become soggy underneath. Place them in a large zip-top freezer bag with a square of parchment paper between each layer. When you need a fast weekday breakfast, just pop a frozen waffle straight into your standard toaster. They crisp right back up in a matter of minutes and taste freshly baked.
Common Mistakes to Avoid (Say Goodbye to Soggy Centers)
Opening the waffle iron lid too early is a guaranteed way to ruin your lovely breakfast. Wait patiently until the steam almost completely stops before checking on them. Also, never stack freshly cooked, piping hot waffles on a flat serving plate. The trapped steam will instantly turn that gorgeous crispy crust unpleasantly soft.
Our Favorite Dairy-Free Sweet and Savory Toppings
Skip the standard pat of butter and try a generous drizzle of warm maple syrup piled high with fresh summer berries. Whipped coconut cream tastes phenomenal on top if you crave a decadent treat. For a fun savory twist, top them with crispy bacon bits and a warm fried egg. The savory, salty crunch pairs perfectly with the slightly sweet base.
Nutrition Information
Frequently Asked Questions About Milk-Free Waffles
Can I make this batter ahead of time?
You can easily whisk the dry ingredients together in advance and store them in the pantry. However, wait to add the wet ingredients until right before cooking. The baking powder will lose its lifting power if the wet batter sits for too long.
Can I substitute the vegetable oil?
Absolutely. Melted coconut oil, canola oil, or even a mild olive oil works perfectly here. Just make sure your eggs are at room temperature if you use coconut oil so the fat does not solidify upon contact.
Why are my waffles sticking to the iron?
Sticking usually happens if the iron is not fully heated before adding the batter. It can also happen if you did not grease the metal plates thoroughly. Give your machine ample time to preheat before ladling anything in.
Can I make these gluten-free?
Yes. You can swap the standard all-purpose flour for a measure-for-measure gluten-free flour blend. Look for a brand that contains xanthan gum to ensure the batter has the best structure and does not crumble.
Waffles Without Milk
AUTHOR: True Taste Buds
You really can make incredibly crispy, golden breakfast treats even if you run out of dairy. This dairy-free waffle recipe uses a simple pantry swap to keep the inside fluffy while achieving that perfect crunchy exterior.
5 MINS
15 MINS
20 MINS
6
Ingredients
- 2 cups All-purpose flour
- 2 tablespoons Granulated sugar
- 1 tablespoon Baking powder
- 1 teaspoon Kosher salt
- 2 cups Water
- 1/3 cup Vegetable oil
- 2 large Eggs, beaten
- 1 teaspoon Vanilla extract
- 1 teaspoon Ground cinnamon (optional)
- 1/2 cup Semi-sweet chocolate chips (optional)
- 1/2 cup Fresh blueberries (optional)
Instructions
- Turn on your waffle maker to medium-high heat and wait for the indicator light. Carefully brush the hot cooking plates with a very thin layer of vegetable oil to prevent sticking.
- In a large mixing bowl, whisk together the flour, sugar, baking powder, and kosher salt. Mix them vigorously until the mixture looks uniform and aerated like soft sand.
- Grab a medium bowl and briskly whisk the water, oil, beaten eggs, and vanilla extract. Beat them together until the mixture turns pale and completely smooth.
- Pour the wet liquids into the center of the dry flour mixture. Use a silicone spatula to gently fold everything together just until the dry pockets disappear.
- Ladle the batter directly onto the center of your hot iron and close the lid tightly. Cook until the steam stops billowing out and the edges look deeply golden brown.
- Carefully lift the crispy waffles out and place them directly on a wire rack inside a warm oven. This crucial step keeps them perfectly crunchy while you finish cooking the rest of the batch.